
Reno Project: Installing Floors and Storage!
Installing Floors: Let the projects begin!
We have a steady stream of projects to report on, but let’s get the ball rolling with installing floors and more storage. This post will be a twofer: both a blog AND a video. What?!? We continue to get fancier and fancier around this site. So for those of you who have limited bandwidth, I present this written version. And for my fancy readers who have actual, streamable internet, I am linking to our most recent YouTube video of installing the floors. Let me know how this works out for you, whichever group you fall into. (And if you’re extra special, feel free to read AND watch the rundown on installing floors)

Installing Floors: Hardwood vs Vinyl Planks
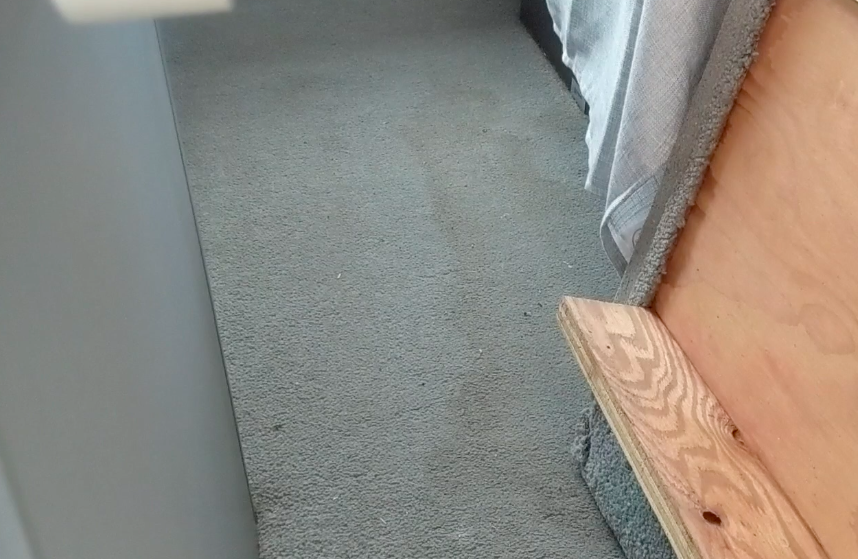
We had two options readily available to us: Option 1: Hardwood planks, which were on-hand and leftover from a stash we found in the attic for the house remodel. Add that little fact to the Pro Hardwood Column. In addition, the hardwood floors don’t need special closeout pieces, as Mark is capable of routing the edges where necessary for a finished look. Another in the Pro Column for Hardwood. Unfortunately, hardwood does scratch and is NOT waterproof. That’s a negative in such a small space with two people and a dog. (One of those humans being particularly klutzy may add yet another tick to the Con list…)
Option 2: The 2nd house remodel we did in Savannah included a vinyl plank installation. This product is super easy to work with and waterproof. Pro Column, please! But, alas, we would’ve had to go and pay for the flooring. As well as closeout pieces, which are freakishly expensive, believe it or not. So cost is definitely in the Con list.
Deciding Factors:
It came down, in the end, to beauty, cost (or lack-there-of) and weight. There’s no denying the Imbuia wood is beautiful. It’s also an excellent warm contrast to all of the cool gray interior. Another fun fact: The hardwood actually weighs less than the vinyl. We saved about 20lbs overall installing floors made of wood vs vinyl.

Storage:
The Rialta QD model comes with two passenger seats just behind the cab. These two seats drop down to make a small bed. This is great if you have a small kid or two. Or plan to pick some up on the side of the road. Or have visitors that you don’t want to visit for very long… We have plans for none of these things. So we (and by we, I typically, but not always, mean Mark) pulled those large, ugly, heavy, useless-to-us beasts out and gained a very large amount of space. And reduced weight – which is always a bonus!
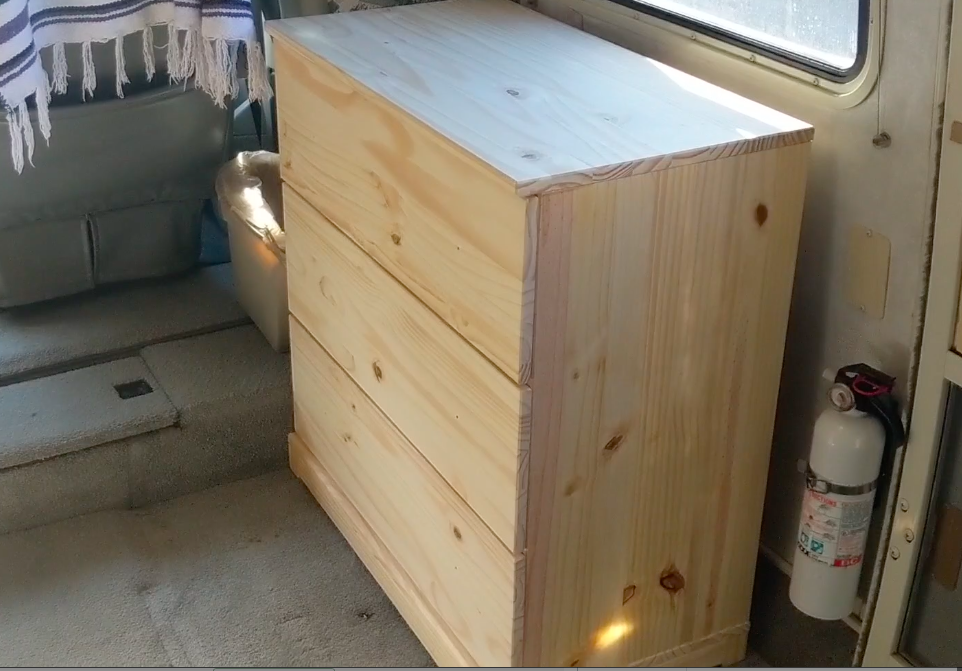
Ikea to the Rescue
When you finally see the end results of all the projects we’ve done, you’ll see little sprinkles of Ikea throughout. Not just the nifty organizer beside the sink, but also the two (yes TWO) 3 drawer chests that now take up part of the space created by removing the chairs.
One chest has essentially become our galley – food, dishes and a few towels make up the passenger side. The driver side chest is for clothes, art supplies maybe, and an insane number of swimsuits. I really need an intervention…

We (Mark) put the chests together and then we (me) stained them and added pretty sparkly knobs. And added cute drawer liners. It’s all in the details, people. And viola! Just like that we went from useless space hogs to double the useable storage in our tiny home on wheels!

The End Results:
While we’ve already managed to scratch the wood once or twice, we are SUPER happy about installing floors to replace that nasty carpet. The RV smells better, looks fabulous and is getting so much closer to ready to roll!
So what do you think of this video/blog combo? Does it work for you? Do you have a preference either way?
Stay tuned for upcoming posts and videos about our Battle Born Lithium Batteries w/Victron Components and solar, painting the interior, painting the exterior and various other DIY projects!


BEAUTIFUL ! ! ! ! !
This really doesn’t help. It’s only end result and not a how-to.
Never claimed to be a How To. Feel free to search YouTube if you need instructions on how to install hardwood floors.
I was just wondering about the thickness of the floor and how you were able to adjust the threshold at the door. Did you remove the cupboards and put flooring under them? Did you have to change the LG tubing for the stove or fridge?
Hi John!
Mark used the prefinished flooring to create all of the nose and trim pieces. Those are glued directly to the floor
We did not have to remove the cupboards to install the floor.
We capped off the propane line to the fridge, because it doesn’t use propane. But the stove still uses it and is in tact.
Thanks for all of the questions! And let me know if you have anymore.
-Jenn
Do you still have the second row seats?
We do not. Are you looking for some?