It’s finally happening. We’ve moved from making curtains and cushions to the meatier, more significant projects!
We hauled the boat on a Thursday (or was it going up on a Tuesday…?) and got a quote that following Friday for the major work. Needless to say, after the quote, we got to work on the prep work on Saturday to try and cut the bill a bit.
Here’s what we’re tackling while we have her out of the water:
Luna Sea’s Project List
- Replace A/C seacock – it appears the one we replaced was made out of brass. That’s a no-no in Marine World. It was replaced with a beefier bronze model.

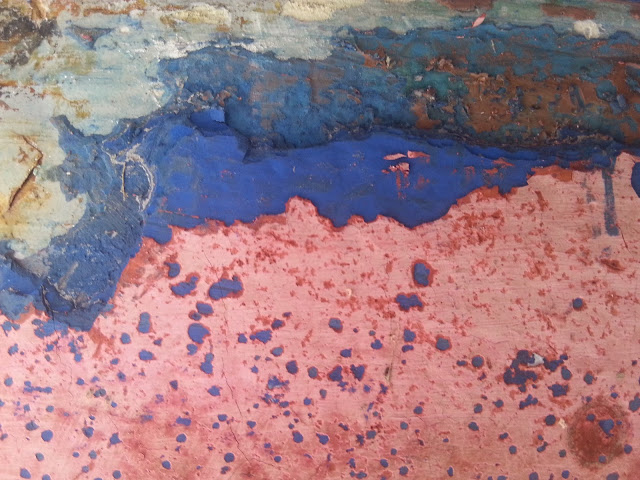
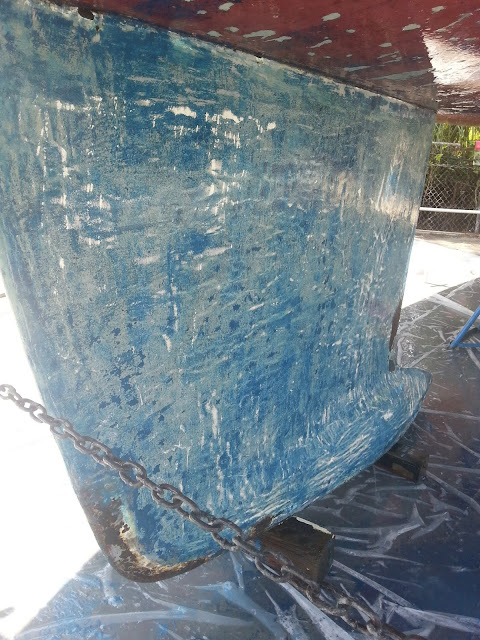
1/4″ thick on the keel… - Remove bottom paint – This is what upped our quote dramatically. There was a 1/4″ of paint on the keel/rudder. The actual bottom of the boat wasn’t as bad, but it still had several layers that all had to come off. Thanks to the fact that she’s been in the water for a few years, as soon as she was on the hard, the paint started to dry and crack. This meant that we could literally just scrape the paint off with a hefty scraper. On the hull, at least. The paint on the keel and rudder was determined to stay put, so those are the key areas we tackled ourselves in order to cut our yard bill. It was a solid 2 days of work, but at $150/hr for the yard/sand blaster, we figured it was time well spent. The yard finished her off with the sand blaster and then sanded all the remaining bits yesterday. The hull is a pretty, clean slate now, and ready for the fancy new bottom paint.

Testing the waters to see what it takes to scrape by hand - New Bottom Paint – This took some research. We ran across Copper Coat at the first boat show we went to and were both incredibly intrigued. It’s basically just an epoxy, and you dump straight copper dust into it vs. putting on a couple of layers of bottom paint. Copper is used in many of the more traditional anti-fouling paints (these paints keep ocean life from growing on the bottom of your boat, thus slowing you down/damaging your prop/rudder, etc). But they are ablative and purposely wear off (ie, end up in the oceans) and have to be re-done every year or so. I realize it’s the standard, but neither of us like the idea of that stuff ending up in the ocean. But you have to do something to the bottom. This product definitely costs more. Probably double or triple, depending. And it has to be put on just right. But it’s pretty straight forward and we did a test run on a friend’s dinghy. Because of the expense involved, and the lack of reviews online, just think of us as your Guinea Pigs. (There ARE excellent reviews online, but only a couple of full-on blog reviews, and that is what we were looking for.) Mark will be at the yard on Painting Day, as he’s the one with the most experience with this product. It’s not something that is done very often. Hopefully not because it’s a sucky product – but because it’s so awesomely-awesome that yards don’t want to use it, as they would miss out on the yearly bottom jobs… Oh, and it ain’t cheap. Did I mention that? Geez.

Most of the paint is gone. And then there’s the rust/damage fwd and aft. - Keel Repair – Ok, this one was NOT on the original list. We discovered some rust/damage on the keel when we got the paint off. It looks like maybe someone wrapped their chain around the keel at anchor – perhaps waaay back in her charter days? A proper repair was done, but it is time to do it again – and perhaps more thoroughly. Anyway – this is under control and close to being finished.

“Tower in a Box” – heading to the stern! - Hard Top/Tower Install – This is HUGE. Seriously. We ordered this quasi-custom set-up from Atlantic Tower at this year’s Miami Boat Show. It arrived in the yard and we were both questioning if our measurements were off. Or if the company built it incorrectly – because how the hell was that going to fit on our little boat? Turns out it’s all relative. It fits just right. Our cockpit is just larger than we realized. Mark took last week off of work and was able to get both the tower and hard top installed. Just a few details to finish and she’s good to go. Then I get to work on the next project. The hard top replaces the bimini and dodger – and prevents me from having to make a connector between the two so that we can quit getting rained on when we sit outside or are sailing in less than perfect weather. The dodger was in ok shape, but the bimini was well past the end of it’s life. The way we had the legs designed also eliminates several of the small, criss-crossing braces that resulted in the need for several yoga sessions prior to getting on the boat. It was a veritable maze of stainless steel braces. And a pain in the ass if you were trying to actually load anything onto the boat, like food or people. The tower/arch off the back will become the home of davits for our dinghy. And our solar panels will go either on the tower or directly onto the hard top. Or both. We’ll see.

Finishing the hard top install. - Full Enclosure – We will have a full screen enclosure and at least the forward section will have a plastic enclosure as well, to replace the dodger we eliminated with the hard top. We will likely have a set of plastic walls around the entire cockpit, as well. These are great in cold weather travel – or just hanging out in the cockpit in cold weather. This will be another new sewing project for me. I’ve already re-built and recovered the salon cushions, the cockpit cushions, the sacrifical on the genoa and the lazy-jack bag. Unfortunately, I won’t have an original to work from – so no template for me to tweak/customize. I’ll be engrossed in my canvas project books and Youtube for the foreseeable future…

Track is already installed on the top for the enclosure walls to slide into. Now somebody just needs to sew them. - Boot Stripe – We are painting the navy boot stripe some shade of gray. Gray, you ask? Yes. I know we have turquoise ALL OVER the boat. But, trust me. While the enclosure will also be Aruba Sunbrella, I’ve been working gray into the mix as well with a variety of Phifertex bags, (future) dinghy chaps, etc. I love the bright blue (and can find our boat in ANY marina), but want to neutralize it somewhat. And gray is how I’m doing it. Not only will it be easy on the eyes, the dinghy will be somewhat incognito when we’re away from the boat. If I made the chaps on the dinghy Aruba, it would be pretty obvious when we’re away from the boat. If I make it in gray, it will be more likely to blend in with others. So we’ll be tying gray into the color scheme. Relax. It will be fabulous. (now don’t get me wrong – I’m still tempted to add a sparkly turquoise stripe up near the port holes… 😉 )

That navy stripe (above the rainbow of bottom paints?) will become gray. - Buffing and waxing the hull/deck/cockpit – While it pains me to do this, we are paying someone to wax the boat. This is one area where we were (unknowingly) lax, and the gel coat is paying the price. So we will have her professionally done while still on the hard, and then we will keep her up. When you know better, you do better.
I think that’s it for projects while we are on the hard. That’s enough, right?!? I still need to make a Sunbrella engine cover for the outboard, but that can wait. We are also inspecting the other sea cocks and the rigging. Like I said, the important work is happening now! Keep the mast up and the water out. Those are our priorities. But it won’t hurt that she’ll look like a brand new boat! 🙂


Wow you guys have a lot of boat projects going on! I'll be curious to see how your bottom paint works out. Cheers – Ellen
As are we! Curious, that is. Each project gets us that much closer to being done – and then we are just in cash-saving mode until we hit the road. Can't wait! And thanks for checking in and leaving comments 🙂